Showing posts with label recipe. Show all posts
Showing posts with label recipe. Show all posts
Thursday, July 25, 2013
Curry Fried Quinoa

I made this recipe awhile back and always meant to post it and hadn't yet, so here it is! I had never thought to do curry-fried quinoa, thinking that it might not be that different from rice, but let me tell you what. Once you make this you'll never go back to rice again! The quinoa gives that extra punch of protein, vitamins, and minerals, and it soaks up more of the flavor. Man, it's good! Even better after a couple days if you can stand to keep delicious leftovers around!
You will need:
1 pot to cook quinoa
1 large tall-sided skillet that can hold your quinoa and veggie mixture
1 cup of uncooked quinoa
2 cups of water
2-3 tbsp coconut oil (you could also use olive oil, but coconut oil has magical properties!)
2 diced bell peppers (I used red and orange)
1 diced large red onion
2 eggs
2 tbsp minced ginger (because I LOVE ginger, you could try 1 tsp if you wanted less)
6 cloves minced garlic (again, less if you don't like garlic a ton, but then I think you're crazy ;o)
10oz bag of frozen peas
2 stalks of green onions, diced
2 tbsp of curry powder
1 tbsp of turmeric (it's SO good for you! Dooo it!)
2 tsp of chili powder
2 tbsp soy sauce (I used shoyu, you could use coconut aminos or liquid aminos, too)

First, start your quinoa. Boil your two cups of water and add the quinoa. Cover it and turn the heat down to low. Let it simmer and the quinoa soak up the water. This will take about 15 minutes, giving you time to finish the rest of the recipe.


(This would also be good with shrimp or chicken, but it's good enough as vegetarian, I promise.)


Thursday, May 23, 2013
Brittany's Best Chicken and Veggie Noodle Soup

Hello,
friends!
In
Portland we recently had a stretch of good weather. Like, really really good
weather. It was in the mid-70s for over a week. But the spring rain started
again and it’s been pretty wet. Yesterday all I could think about was curling
up with a big bowl of chicken noodle soup. We had all the ingredients and I had
some time before Spanish class, so I knew it was the right thing to do. Also,
Jonathan had a dentist appointment over on the waterfront and I knew he’d be
soaked from riding in the rain to and from there and would probably like some
soup to warm up with!
It’s
been several months since I’ve made soup and, I gotta say, last night’s soup
was AMAZING. Probably some of the best soup I’ve made. It’s jam-packed full of
healthy stuff AND you can clean out your fridge! And I get to eat some
leftovers for lunch today, which I’m pretty excited about. So get to making
this soup!
All
ingredients are approximations, as per my usual soup-making. :o)
6
medium carrots
3
chicken tenders (about 1.5 breasts’ worth)
1.5
diced onions
Last
bit of almost-bad kale (small handful’s worth)
Two
large fistfuls of spinach
¼
cup of diced mushrooms
½
cup of frozen corn
¾
cup of frozen peas
1.5
cups of uncooked whole wheat penne pasta
1
tbsp of chicken stock concentrate
Salt
and pepper to taste
1
tbsp of thyme
2
tsp of chili powder
2
tsp of cumin
2
tsp of turmeric (turmeric in EVERYTHING – it is good for you!)
Pre-heat
your pot on medium heat and throw in a couple good-sized blobs of coconut oil.
You could also use olive oil. When it gets warm, toss in your diced onions.
While those cook a bit chop your carrots into small pieces. After the onions
have cooked for five minutes or so, toss those carrots in there and stir them
around. The chicken I used was frozen still, so don’t worry about thawing your
chicken. Put the chicken on top of the onion and carrots and fill the pot with
water, leaving about two inches of room at the top. Turn the heat to high and
let everything boil for five minutes or so. Toss your spices, salt and pepper,
and the chicken stock concentrate in now. After everything has boiled a few
minutes, turn the heat down and let it simmer for a while. It’s going to start
smelling really good!
After
it’s simmered for a while, take the chicken pieces out and shred them. (Do I
have to tell you to make sure they’re fully cooked? Don’t be dumb and get
chickenella.) Throw them back into the pot and turn the heat back up to
medium-high. Toss the noodles in there and let them cook. How long do whole
wheat noodles take to cook? I cooked mine for maybe 11 or 12 minutes? When the
noodles are done, toss in the mushrooms, kale, spinach, peas, and corn, and let
it cook for a few minutes.
BAM!
This was a super easy and relatively fast recipe. Plus, it made a ton of
leftovers, which is always awesome. So go now and make this soup!
Friday, February 22, 2013
Awesome Stuff I Pinned This Week

This little guy is in "my" neighbourhood right now and makes me smile every time I see it!
My friends, I pinned more this week than I ever have, EVER. I was one of THOSE people on Pinterest. I pretty much flooded my followers with pins. SORRY. I think since I haven't really been home in months that I am dreaming of my apartment and my space. Since Jonathan and I have decided we're going to be living in our apartment for probably a few more years, I might as well decorate it more how I'd like, especially with trying to streamline things and make it more how I'd like.
If you want to check out all of my pins, there is a ton of organic modern decorating stuff happening in there. Here's a small amount of what I actually pinned this week......
*Spinach Egg Cups (made this last night!! So good!)
*Cauliflower Crust Garlic "Breadsticks" (I am changing my blog name to "Pro-Cauliflower Propaganda")
*Dakota Coffee Table (budget version of the table I like at West Elm!)
Have a wonderful weekend! I am going to be meeting an internet friend for the first time, hanging out with the dogs, and then Amy and I will be MEETING LIL BUB!!!!!!! Hope your weekend is as awesome as mine. ;o)
Thursday, February 7, 2013
Anti-Inflammatory Recipe: Quinoa Pizza Crust


As promised, here is the quinoa pizza crust I made last week! I will definitely be making it again, although next time I will follow the directions better. I found this recipe on Charity Dasenbrock's For Life! page and it looked so intriguing! Since I had just made the cauliflower crust pizza I figured quinoa had to be just as good! Plus, it's quinoa so you know it's going to be nutrient-dense and filling. It didn't fail to make me happy!
This recipe is supposed to make two 8" crusts, but I figured I would try making it in one bigger pan. It didn't totally work, so next time I will try making two smaller crusts. It still tasted great, but it didn't get crispy in the middle at all. It was a little spongy (for lack of a better word), but tasted totally fine. I'm not real picky when it comes to food! It also stuck to the bottom of the pan in the middle, so next time, yes, I will follow the directions. ;o)
1.25 cups quinoa
1/2-3/4 cup water
Pinch of salt
1/4 cup olive oil
Soak the quinoa over night, two nights if you have time. It will help the nutrients become more available. As Charity says, "This step is important for removing the phytates. Phytic acid is an 'anti-nutrient' which binds up the minerals in the grain and prevents the body from using them." So soak the quinoa!
When you are ready to make the crust, preheat the oven to 450*. Blend the drained and rinsed quinoa with 1/2 cup water and a pinch of salt. You may end up needing a little more water, but start with 1/2 cup. Blend the mixture until it resembles pancake batter. Divide the olive oil and cover the bottom of the two pans. Place them into the oven until the oil is shimmering hot. Remove from the oven and divide the quinoa mixture between the two. Bake for 20 minutes and then flip and bake for another 10 minutes. Put toppings on your pizza and then bake a few more minutes to warm them. (I used the rest of the avocado pesto and my toppings from the cauliflower crust pizza. Yummy!)
Voila! Crunchy, nutritious pizza crust from quinoa! Big thank you to Charity for her totally delicious recipe that I look forward to making again CORRECTLY!!
Wednesday, February 6, 2013
Anti-Inflammatory Recipe: Cauliflower Crust Pizza

Since I started my cleanse/eating anti-inflammatory foods I have missed a few things, one of them being pizza. I was looking for anti-inflammatory recipes online when I stumbled across The Detoxinista's blog. OH. MAN. Everything on her page looked GOOD. I ran through a few recipes and then I found a recipe for cauliflower pizza crust. It sounded so odd to me. How could you make a cruciferous vegetable resemble anything like delicious, crunchy, warm pizza crust? I am game for new recipes and crazy-sounding ideas, so I thought I'd try it. Jonathan was the ultimate one I was going to have to win over. I promised him that if he didn't like it that I would cook him a freezer pizza and I would eat mine.
I followed the recipe. I realized that my crust was going to be smaller than anticipated, so even if the pizza turned out delicious Jonathan was still going to have to eat some of his freezer pizza. I made the Detoxinista's avocado pesto to spread on the pizza. I was thinking it would go good with sun-dried tomatoes, caramelized onions, and herbed goat chevre. I was holding my breath.
Friends, my pizza was so gosh darn delicious!! Even Jonathan wished the pizza had been bigger because it was so good! I am so, so happy to share this recipe with y'all because I am sure you will love it! Thank you to the Detoxinista for such amazing recipes!
Her recipe comes thanks to Doris Choi. I changed the recipe just a little bit to accomodate what I had on hand.
4 cups raw cauliflower rice
1 egg
1/3 cup chevre
Pinch of salt
To make the cauliflower rice, pulse batches of raw cauliflower florets in a food processor until the grains are a rice-like size. (The original recipe calls for 4 cups cauliflower rice, which was 1.25 heads of cauliflower. Next time I will use both heads of cauliflower to make the crust bigger, which means I would add a bit more egg and chevre.)
Fill a pot with about an inch of water and boil the cauliflower rice for five minutes. Drain the rice into a strainer and then put into a clean dishtowel and squeeeeeeze the extra water out of it.
To make the dough, put the cauliflower rice, egg, salt, and chevre into a bowl and mix with your hands. You want it really well mixed! Put the dough onto a baking sheet lined with parchment paper and flatten into a crust about 1/3" thick. Make a little wall of crust around the outside if you want.
Bake for 35-40 minutes at 400* or until golden brown.
Next, the fun part: toppings! Put the toppings on your pizza and then bake for another 5-10 minutes. Voila! Your pizza will come out delicious! It created believers out of both Jonathan and I as to how good a cauliflower pizza crust can be.
Just for fun, I ended up trying a quinoa crust a few nights after to see how the difference was and it was good, as well! Stay tuned until tomorrow for that recipe!
Friday, January 18, 2013
Anti-Inflammation Cleanse Recipe: Cabbage Walnut Salad

It's Friiiiiiday! Whoo hoo! I hope y'all have enjoyed the recipes I've posted this week! Sorry for no Awesome Stuff I Pinned This Week today. Just wanted to squeeze in *one* more recipe! And it's a good one: cabbage walnut salad with almond butter dressing.
The dressing for this salad is so ridiculously good. Like I need ONE more way to get almond butter into my diet. I could eat it every day! (Oh, wait, I HAVE been eating it every day since January 1!) As with the other recipes I've posted this week, this is intended to be one large serving, so double or triple it as needed.
1/4 head of purple cabbage
1/2 cucumber, chopped
1 handful sugar snap peas
1/4 cup walnuts
1 tbsp almond butter
1 tsp coconut milk
1 tsp coconut amino acids
1 tsp apple juice
Chop cabbage, cucumber, and snap peas well. Put in a bowl with walnuts. In a separate cup, mix well almond butter, coconut milk, amino acids, and apple juice. Pour the mixture on top of the cabbage and enjoy! I usually make this salad in the morning for lunch at work and keep the dressing in a separate container until it's time to eat, in case it gets slimy or weird. (Same thing with the Tuna Salad recipe.)
This recipe is one of the ones I loved from the Shift Cleanse I have been doing since January 1! Big thank you to Skylor for letting me share a few of her recipes! (In case you missed it, I was posting one recipe per day this week that I have loved from the cleanse.) This ends my posting for the week, so I hope you have a good weekend and eat some good food!
Previous recipes posted: Basil Garbanzo Beans with Quinoa, Tuna Salad, Chicken Vegetable Soup, and Thai Coconut Soup.
Previous recipes posted: Basil Garbanzo Beans with Quinoa, Tuna Salad, Chicken Vegetable Soup, and Thai Coconut Soup.
This post is about me tackling one of my 2013 resolutions. Won't you follow along?
Thursday, January 17, 2013
Anti-Inflammation Cleanse Recipe: Thai Coconut Soup


Could we call it Thai Thursday? This Thai-inspired recipe is delicious, savory, and warming with the ginger in it. The leftovers reheat well, too. As with the other recipes I've posted this week, this is intended to be one large serving, so double or triple it as needed.
4 cloves garlic
1 tbsp minced ginger
2 tbsp coconut oil
1/2 sweet onion, chopped
1 bunch scallions
1 carrot, chopped
1 chicken breast, cut into small chunks
1 cup of water
1 can of light coconut milk
2 baby bok choy heads, chopped
Use a garlic press to mince both the garlic and ginger. Heat coconut oil in a pot over medium-high heat. Add the ginger and garlic; saute for about one minute. Add the onion and carrot; saute for about 3 minutes. Add the chicken and cook 6-8 minutes, stirring, until lightly browned. Add the water and coconut milk and bring to a boil for about 5 minutes. Finally, turn back down to medium, add the baby bok choy, and cook for about 5 minutes longer. Serve and enjoy!
4 cloves garlic
1 tbsp minced ginger
2 tbsp coconut oil
1/2 sweet onion, chopped
1 bunch scallions
1 carrot, chopped
1 chicken breast, cut into small chunks
1 cup of water
1 can of light coconut milk
2 baby bok choy heads, chopped
Use a garlic press to mince both the garlic and ginger. Heat coconut oil in a pot over medium-high heat. Add the ginger and garlic; saute for about one minute. Add the onion and carrot; saute for about 3 minutes. Add the chicken and cook 6-8 minutes, stirring, until lightly browned. Add the water and coconut milk and bring to a boil for about 5 minutes. Finally, turn back down to medium, add the baby bok choy, and cook for about 5 minutes longer. Serve and enjoy!
This recipe is one of the ones I loved from the Shift Cleanse I have been doing since January 1! Big thank you to Skylor for letting me share a few of her recipes! (In case you missed it, I am posting one recipe per day this week that I have loved from the cleanse.)
Previous recipes posted: Basil Garbanzo Beans with Quinoa, Tuna Salad, and Chicken Vegetable Soup.
Previous recipes posted: Basil Garbanzo Beans with Quinoa, Tuna Salad, and Chicken Vegetable Soup.
This post is about me tackling one of my 2013 resolutions. Won't you follow along?
Wednesday, January 16, 2013
Anti-Inflammation Cleanse Recipe: Chicken Vegetable Soup

Today's recipe is for a delicious chicken and vegetable soup with an ingredient I would have never thought to put into soup: apple! I was a little curious how it would turn out, but it is FABULOUS! As with the other recipes I've posted, this is intended to be one large serving, so double or triple it as needed.
1 carrot
3 cups water
1/2 head broccoli
1/2 sweet onion, well-chopped
4 garlic cloves, minced
1 apple
1 chicken breast, chopped into small pieces
2 tbsp poultry seasoning (I used seafood seasoning)
salt & pepper to taste
Bring 3 cups of water to boil. Add poultry seasoning, chicken, onion, and garlic cloves. Turn down to medium and cook for 25 minutes. Chop the apple, carrots, and broccoli while this is cooking. Then add them as well as salt and pepper. Cook on low for about another 25 minutes. Remove and eat!
The broth alone on this soup is so flavorful and delicious! The sweetness of the apples blend well with the savoriness of the chicken and vegetables. It's delightful!
This recipe is one of the ones I loved from the Shift Cleanse I have been doing since January 1! Big thank you to Skylor for letting me share a few of her recipes! (In case you missed it, I am posting one recipe per day this week that I have loved from the cleanse.)
Previous recipes posted: Basil Garbanzo Beans with Quinoa and Tuna Salad.
This post is about me tackling one of my 2013 resolutions. Won't you follow along?
Tuesday, January 15, 2013
Anti-Inflammation Cleanse Recipe: Tuna Salad

It's Tunafish Tuesday!
This recipe makes sooo much delicious food! I had to modify it quite a bit to make Brittany-sized portions, so play around with it or do the original recipe. As with the other recipes I've posted, this is intended to be one large serving, so double or triple it as needed.
1 can tunafish
1/2 cup green peas
1 avocado
1/4 head broccoli, chopped
1/4 head well-chopped purple cabbage
1 handful of spinach, chopped
1/4 chopped red onion
1 cup chopped grapes
1/2 squeezed lemon
1/3 tsp lemon pepper
1 tbsp basil oil
Combine tunafish, peas, onion, broccoli, grapes, and cabbage. In a blender, combine basil oil, lemon, avocado, and lemon pepper. Blend until smooth, then pour over the tunafish mixture. Put this on a bed of spinach and enjoy!
For my Brittany-sized portion I was taking a little bit of broccoli, grapes, purple cabbage, and a sprinkle of chopped cashews and mixing that with the fish and avocado mixture and that was delicious, as well!
This recipe is one of the ones I loved from the Shift Cleanse I have been doing since January 1! Big thank you to Skylor for letting me share a few of her recipes! (In case you missed it, I am posting one recipe per day this week that I have loved from the cleanse.)
Previous recipes posted: Basil Garbanzo Beans with Quinoa.
This post is about me tackling one of my 2013 resolutions. Won't you follow along?
1 can tunafish
1/2 cup green peas
1 avocado
1/4 head broccoli, chopped
1/4 head well-chopped purple cabbage
1 handful of spinach, chopped
1/4 chopped red onion
1 cup chopped grapes
1/2 squeezed lemon
1/3 tsp lemon pepper
1 tbsp basil oil
Combine tunafish, peas, onion, broccoli, grapes, and cabbage. In a blender, combine basil oil, lemon, avocado, and lemon pepper. Blend until smooth, then pour over the tunafish mixture. Put this on a bed of spinach and enjoy!
For my Brittany-sized portion I was taking a little bit of broccoli, grapes, purple cabbage, and a sprinkle of chopped cashews and mixing that with the fish and avocado mixture and that was delicious, as well!
This recipe is one of the ones I loved from the Shift Cleanse I have been doing since January 1! Big thank you to Skylor for letting me share a few of her recipes! (In case you missed it, I am posting one recipe per day this week that I have loved from the cleanse.)
Previous recipes posted: Basil Garbanzo Beans with Quinoa.
This post is about me tackling one of my 2013 resolutions. Won't you follow along?
Monday, January 14, 2013
Anti-Inflammation Cleanse Recipe: Basil Garbanzo Beans & Quinoa

Man, you guys are so lucky this week! I have been receiving lots of questions about recipes from the Shift Cleanse I've been doing, so I asked Skylor if I could share some recipes and she said yes! From today through Friday I'll be posting one of my favorite Shift Cleanse recipes every day. Hopefully this will inspire some of you to do the cleanse (because I am loving it so much!!) or at least try some new recipes you might not have tried before!
Today's recipe is basil garbanzo beans and quinoa. The recipe originally called for rice, but I made it with quinoa and it was SO good! I'm sure it would be just as good with rice, so try it both ways. I plan to!
The recipe makes enough for one large serving, so if you plan on serving it to multiple people, perhaps double the recipe. It made enough for three filling servings for me, so tweak it as you need to!
1/3 can garbanzo beans
1 tbsp coconut oil
1 carrot, diced
1 cup cooked quinoa (or brown rice)
3 cloves garlic, minced
1/4 red onion, diced
1 tbsp basil oil (with your blender blend 8 or so leaves in 1 cup olive oil, let sit to let leaf bits rise to surface and then strain)
salt & pepper to taste
Heat the coconut oil in a large skillet over medium-high heat. Add the garlic and onions and cook until they begin to soften, about 6 minutes. Add the quinoa and carrot, cook for about 2 minutes longer. Finally, add the beans. Cook until they are heated through. Stir the basil oil in. Then add salt and pepper to your liking and enjoy!
A huge thank you to Skylor for letting me share her delicious recipes!! (Eating nothing but these types of recipes for the past two weeks has made me lose over 5lbs while eating spoonfuls of almond butter and avocados every day, eating about twice as many calories as I "should" eat to lose weight, feeling full all the time, and not really doing any exercising other than walking around 2 miles a day.)
This post is about me tackling one of my 2013 resolutions. Won't you follow along?
Tuesday, December 18, 2012
Recipe: Spiced Red Lentil, Tomato, and Kale Soup


Posting this recipe has been a long time in the coming. I made this soup at least two full weeks ago, but the past fortnight has been a crazy mishmash of the new job, house-sitting, trying to see friends, and more. And, you know, it being the Christmas season and all.
But let's talk about this soup. WOW. It was unlike any soups I have made before. The flavor was smoky and had a lot of depth. Jonathan was really impressed by it! (He is the ultimate test of things.) This was a recipe that I actually followed almost to a T, since it was so different than anything I'd done previously. I must say, Angela of Oh She Glows did it again! The only change I made was spinach instead of kale! I also used less water, which made the broth thicker. This wasn't done intentionally. I was trying to double the recipe and got to the end and couldn't double the water in the pot. Oops. ;o)
Please check out Angela's recipe for Spiced Red Lentil, Tomato, and Kale soup! You'll be sorry if you don't!
Friday, October 26, 2012
Recipes and DIY Goodies!
I've made and used a few recipes lately that I LOVE and simply must share! Two of them are food and one is a great toilet cleaning recipe that made my toilet sparkle and smell heavenly!
Recipe #1: Spicy Potato 'n' Black Bean Burritos


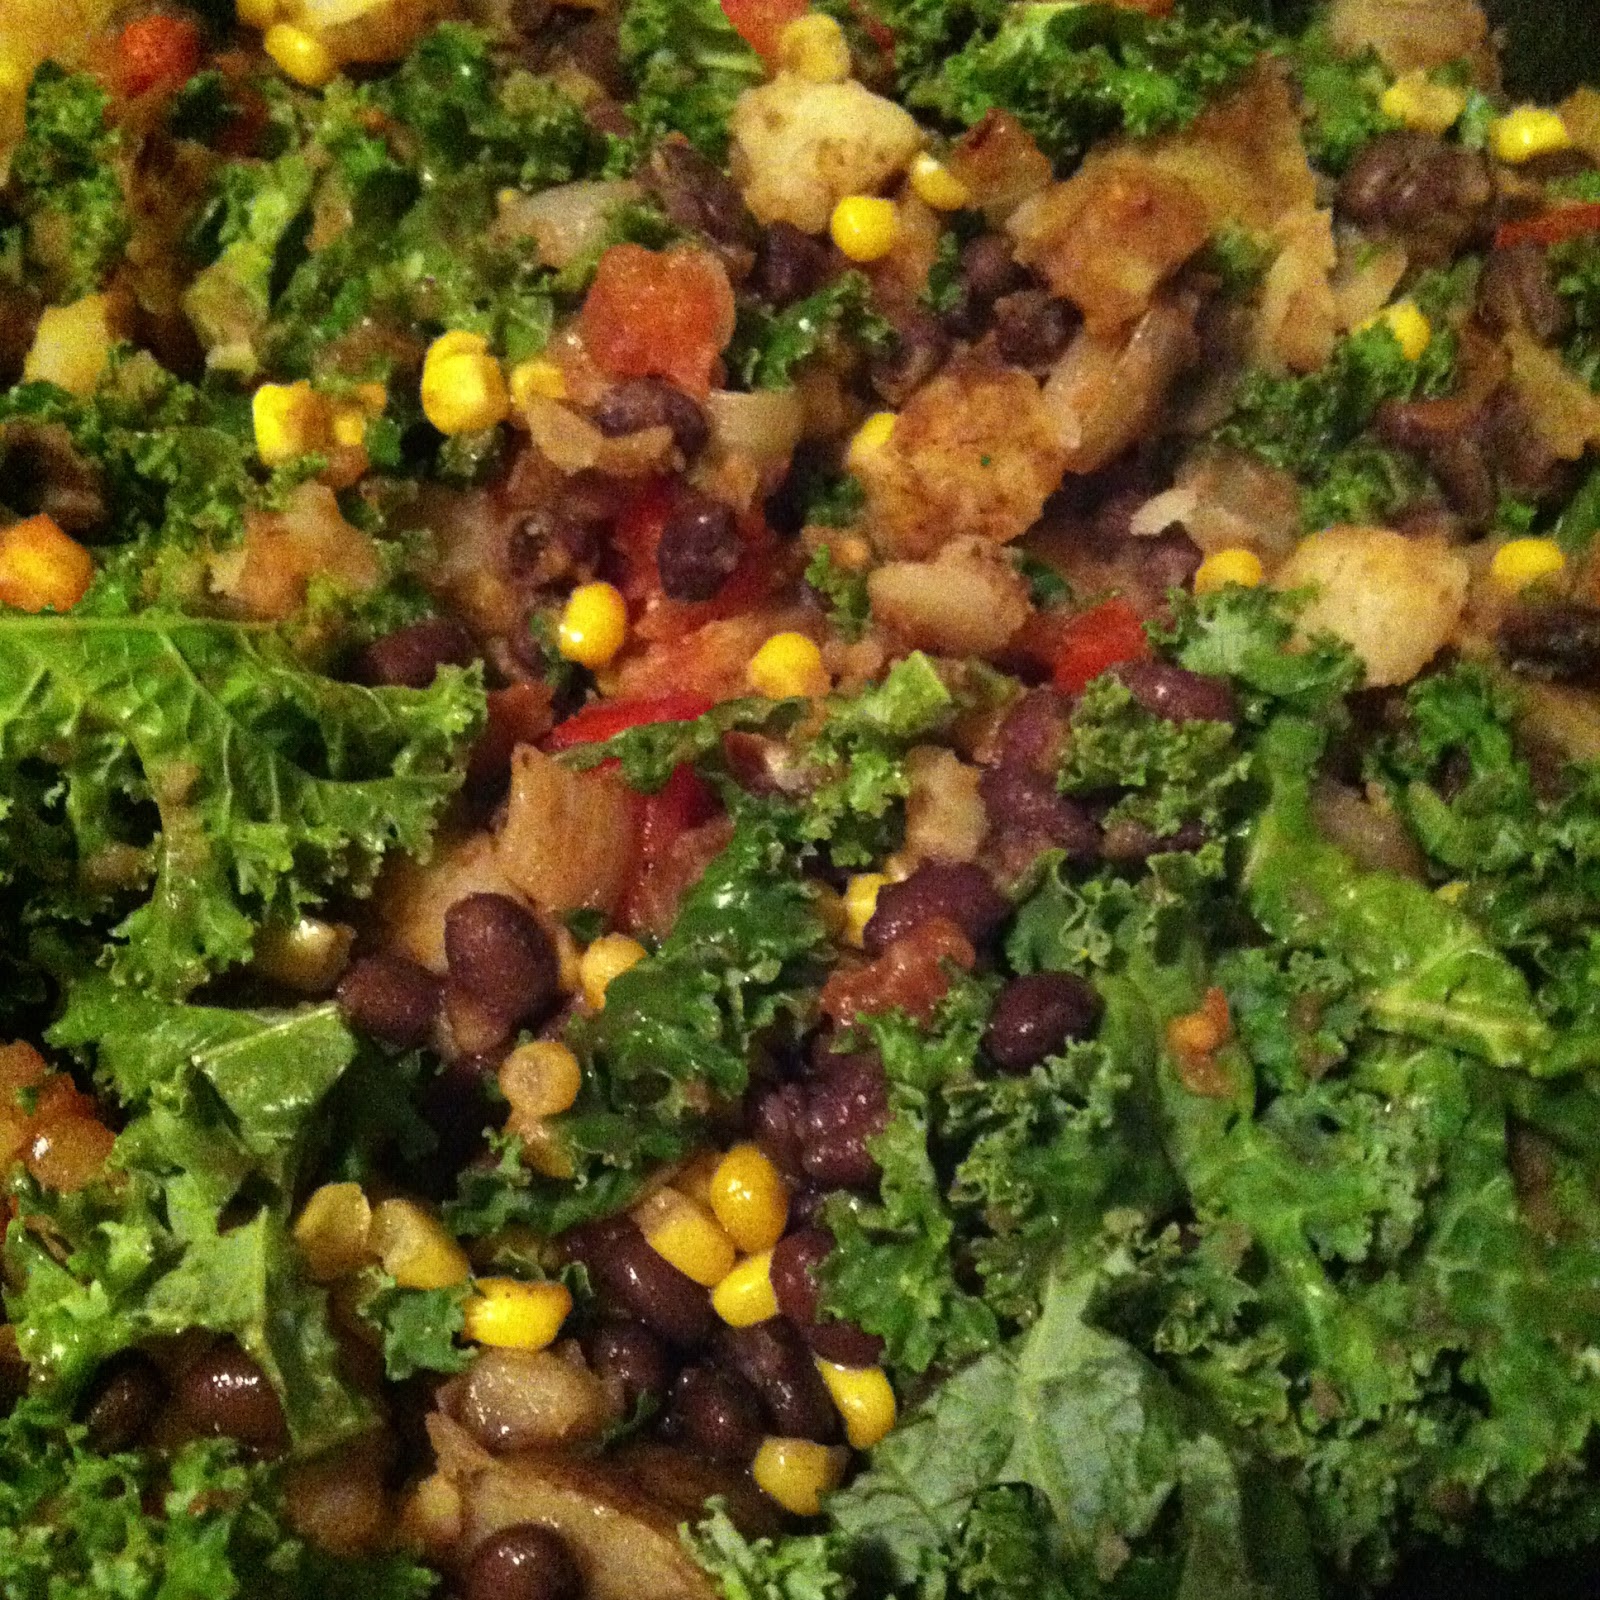
I have made these burritos several times in the past few weeks! They are jam-packed with vegetables and flavor, are very filling, and pack easily, as they aren't liquidy at all so the tortilla doesn't get gross and slimy. I do make a few changes from the original recipe, though. I don't do the spicy sauce stuff and just season mine with salt, pepper, and lime juice. Also, I tend to add corn because everything is better with corn! The recipe also makes a hefty amount. Usually enough for one Jonathan-sized tortilla, and three Brittany-sized tortillas. And all for not very expensive! Like I said, these rock!!
Recipe #2: Kitchen Sink Nut Butter


I made this nut butter recipe the other day for the first time and it is a WINNER! It is a perfect blend of savory and sweet. I didn't pre-roast the nuts with the maple syrup (because we don't have syrup). I also used hemp seed powder instead of full hemp seeds. I don't think it matters! I also put in a sprinkle of some greens powder for extra oomph. I have been eating little spoon-sized amount of this from the fridge because we don't have any bread right now for me to make sandwiches with. I do have some green apples that I am going to spread this on, though, for a yummy snack!
Recipe #3: Homemade Toilet Bowl Cleaner Recipes
I used the toilet bowl cleaner recipe at the bottom of this page. The tea tree oil and lavender combination smelled REALLY good and my toilet got cleaner than I expected. Gunk has still not started building up either, so yay for that! Just wanted to share this recipe since it's cheap and easy to make!
The weather here in Portland has changed and it now seems to officially be fall. The leaves are changing and there is definitely a chill in the air! The bad part is that our apartment is fairly damp and so this now means we must start using our dehumidifier, causing our electricity use to go up, although it's better than having things get musty and moldy. Today I did laundry for the first time at home in a month (when I was house-sitting I was using their machines) and hung the two loads on our drying rack. When I leave for work I'll turn the dehumidifier on in this room and the clothes will be almost completely dry by tonight! Much better than having damp clothes for days!
I hope everyone has a great weekend! Are y'all doing fun Halloween stuff? Jonathan and I are going to a party that should be pretty fun. I didn't have time this year to put together a great costume, so I will probably be wearing my fall-back costume of pink Adidas tracksuit, pink and gold shoes, and gold bling and be a rapper. Everyone stay safe! I can't wait to see pictures of people's costumes over the next few days!
Monday, September 10, 2012
How To: Cook Oysters in the Oven


I found out something new the other night: I like oysters! I'd had them before years and years ago and they were raw. I didn't like them. I'm big on texture and the texture was just icky. But the other night when my friend Allison invited me to eat three dozen oysters with our friend Katie I was hesitant but said yes. I'm SO glad I did because I found out that oysters cooked in the oven are magically delicious!
Apparently, 400* for about eight minutes is the secret. Since people eat them raw, it doesn't really matter how little they're in the oven, but Allison told me that as soon as the first oyster pops open a little bit then you can call them done. Let them cool a bit, then open them from the back with a shucking knife. Drop four drops of Sriracha (four drops was the perfect amount for me!) and a squidge of lemon on that sucker and suck it down. DELICIOUS! I could have helped eat another three dozen oysters!
So, anyway, I thought I'd share this because I didn't think I liked oysters at all, but I just needed them prepared in a way I liked them, so maybe anyone who thinks that they don't like oysters either can try them this way! What are some foods that you used to not like but just didn't have them prepared in a manner that was right for you?
Thursday, June 14, 2012
Recipe: Homemade Tahini

As some of you may know, I was really excited the other day because I got a Cuisinart DLC-8 food processor off of Craigslist for only $40. I've been wanting a food processor for awhile, but they can be fairly expensive and I didn't want a cheap, crappy one. I just assumed that I would buy an expensive one down the road when I had more money to spend on things that aren't absolutely necessary. However, after finding one of my new favorite blogs, Oh She Glows, I ramped up my food processor search again. SO MANY YUMMY RECIPES. (Seriously, after you read this blog post, go over there and drool over every single thing posted. That's what I did! Read backposts for hours. Drooled. Searched CL some more.)
Jonathan and I went grocery shopping last night and I decided to prep some food for the next few days because my schedule is going to be BUSY. Working at...work, working for Karina all weekend, house-sitting, followed by driving to Cheshire Sunday night after working the market all day and breaking every thing down, then two days of hanging out with Jonathan's family. Yeah, you betcha I was going to plan ahead, as to not drive myself crazy later!
The recipe I wanted to make for dinner tonight is the Layered Raw Taco Salad for Two. I get to make walnut taco "meat" and the cashew cream sauce, both in the food processor. I will let everyone know how it goes! Doesn't the recipe look yummy? I made salsa, which I will need tonight, as the first thing ever in the new food processor. Everything was chopped and mixed in a whopping four seconds, if that. This saves so much time!
The next thing I made was tahini, which I will need when I make the Lightened Up Protein Power Goddess Bowl. I think I'm going to make this for dinner Saturday night so I can eat leftovers for lunch on Sunday at the market. (I'm going to make the Spicy Potato 'n' Black Bean Burritos tomorrow night.) I'm making myself hungry just looking at these recipes, knowing I have all this yummy stuff in store!
I am excited to make tahini because it is often expensive to buy. I mean, it's toasted sesame seeds and olive oil. Why is it so expensive? Hopefully you, too, will make your own tahini from now on! The smell of toasting sesame seeds was pretty yummy!
You will need:
*1 cup sesame seeds
*2-3 tablespoons to 1/4 cup, depending on how oily you want your tahini
This makes about a cup of tahini - what a surprise! ;o)

I toasted the sesame seeds in a skillet over low-medium heat.
I made sure to keep them moving so they wouldn't burn.

This is how toasty I got mine. Some were definitely darker than others.
This took maybe 5-8 minutes?

Puree with olive oil and voila! Tahini!
I used probably 5-6 tablespoons? I didn't measure.
This smells and tastes amazing and I'm looking forward to using it! Also, I can't wait to make more nut butters in our food processor once we use up the rest of the peanut butter we have in the cupboard. I freaking LOVE almond butter, but it's too expensive for me to buy, so now I will make it myself!
What new recipe have you tried lately that you love?
Monday, June 11, 2012
Recipe: Caprese Salad with Chicken Sausage and Bruschetta

Hello, friends.
Is it okay with everyone that I'm posting more often? I've felt like I've had mental time lately to do more and I've missed blogging. I miss sharing things online and hearing from people. Hopefully you guys are okay with that. ;o)
Last night for dinner I made a recipe that was this based on this. I used more of what we already had and what I can afford right now. Luckily, it was delicious and Jonathan gave it two thumbs up!
My version's ingredients:
*7 Roma tomatoes
*1/2 red onion
*3 chicken sausages
*Lots of basil
*Red wine vinegar
*Balsamic vinegar
*Olive oil
*Salt & pepper
*Small loaf of French bread
This whole dinner took maybe ten minutes to make! I chopped the chicken sausages up and put them into a skillet, cooking them on medium heat. I chopped the tomatoes, onion, and basil up, and mixed them all together. I glugged in a splash of olive oil, a couple dashes of balsamic, and several more dashes of red wine vinegar. I salted and peppered. I crumbled more Cotija in than may have been necessary, but it was delicious. I broiled my little crusty breads and by the time they were ready, the chicken sausage pieces were done and mixed into the veggie bowl. Voila!
This was an easy meal that wasn't really heavy. I think Jonathan's only wish was that the bread was bigger around so that he could properly stack the mixture on top. This unmentioned request has been noted. :o)
Tuesday, May 15, 2012
Recipe: Taco-Seasoned Chickpea Salad

I have to admit: this salad was not my idea. When I was helping Shana and Shawn with their craft show needs they both fed me very well while I was at their house. Lots of veggies, smoothies, and juices (and the occasional beer or gin & tonic ;o). One of the meals that stuck with me was a salad Shana made that was similar to this one. She remarked something about it like, "When you want to eat a taco, but know that isn't the best idea." Because I could eat tacos every day, but my waistline doesn't necessarily need that, I appreciated this salad idea even more!
I made it last night for the first time and Jonathan went WILD about it. He had worked a twelve hour day and I had the chickpeas roasting in the oven when he got home and some of the first words out of his mouth were, "It smells GOOD in here!" When we'd prepared the salads on our plates and were eating them he said, "This salad is so awesome. It's exactly what I needed after working a twelve hour day." He couldn't stop gushing about the salad. It made me feel awesome!
So, friends, I'm going to share this magical salad with you because it's just so darn good. Thank you to Shana and Shawn for sharing your yummy food with me and providing me with new ideas for meals!
I usually have dried chickpeas in the house, but didn't plan ahead for this salad, so I went ahead and bought a can of chickpeas. I rinsed them off and tossed them in a bowl with a drizzle of olive oil and a couple teaspoons of taco seasoning. Roast them in the oven at 400* for about 25-35 minutes and shake them about 15 minutes into the cooking so they roast evenly.
I made the most basic guac in the world by mashing up an avocado in the bowl that I mixed the chickpeas in, so that it would get a little bit of the taco seasoning residue. I drizzled a tiny bit of olive oil on top, added some salt to taste, and a little bit of red onion.
Meanwhile, I used some spring mix, some spinach, and some extra romaine for crunchie factor as the salad base. I sprinkled corn on it, a few tablespoons of salsa, crushed up seven tortilla chips or so (more crunchie factor - "crunchy" is a food group that I try to get into my diet daily ;o), topped it with about 1/4 cup of the chickpeas, half of the guac, and then a few tablespoons of Briannas Chipotle Cheddar salad dressing (which is surprisingly spicy, to me at least). Voila! Pretty simple, but, oh, so tasty!!
Does anyone else have any salad recipes or combos they'd like to share? We eat a lot of salads and veggies in the summer because it's too hot to cook, so I like having salad ideas so we're not making the same things all the time.
Enjoy!
Tuesday, May 8, 2012
New Summer Recipes!

Yum yum yum yum and more YUM!! This salad was so good that Jonathan wants it as his birthday meal next month! I mostly followed the recipe, but I used a little less shrimp to save money, added a splash of my IPA into the dressing, and also used way more garlic than it mentioned. It came out absolutely delicious! I broiled the shrimp and the heat of the shrimp melts the goat cheese and makes it all creamy and fantastic. Oh, my mouth is watering just thinking of this!

We had this salad as a side to the shrimp salad (yes, a salad side for a salad ;o), which I felt comfortable doing because I knew the flavors of each salad would be totally different. I followed the recipe for this salad, but felt like it could have used more ginger and lemon juice than the recipe called for. I added more lemon juice, but only bought enough garlic for the recipe, so next time I will know to buy a little more! I would have also cut the veggies smaller. Some of the bites were a little...big.

This soup made for some really great leftovers. I think the only difference I made for this recipe was adding an extra stalk of celery and adding a ton more cilantro. We love cilantro in our house! I would have used more lime if I had it, too. I also learned from the Googles on this recipe that you can freeze hominy, which is great because I could only find a giant-sized can of it.
So there you go! Three summer recipes tested by me that are bound to please! Thank you to Real Simple for another batch of great recipes!
Tuesday, March 27, 2012
My New Favorite Recipe: Arepas!

There's a food cart here in Portland that sells arepas, delicious corn patties filled with things like meat, cheese, salad, eggs, and the like. I had one last year that was seared tuna. It was GOOD. That simple meal has stuck with me and I didn't want to have to pay $6+ for it. I found a recipe for arepas and made my own delicious idea of what I think the best filling is. (Needless to say, these are probably not really traditional.) I've now had several requests to share my recipe and so here it is!
I have been using this recipe as my base recipe. I've now used the recipe several times and it works great. One thing to note, since the arepas are unleavened, they're not going to be puffy like an English muffin or bread. They're kinda squishy and chewy but also toasty on the outside. Some arepa recipes call for cheese or other ingredients, but I went for this recipe because it's cheap and we like cheap right now. ;o)


Mixing up the dough

This is the flour I'm using. It was $2.50 at WinCo and will last forever!

Arepa patties, pre-cooking

Cooking them in the oil. You're not frying them, just use enough oil to keep them from sticking!

Black beans are yummy!

Homemade pico. (YUM!!)

The arepas after baking. So yummy!
Our usual final product looks like the top photo. Sometimes we put quinoa in them for extra protein, although they are really filling with just black beans, pico, and a blob of sour cream. They are great for breakfast, lunch, or dinner (not that I would know...hee hee!).
Any questions on the recipe? I'm just super excited to have found a new recipe that's cheap and that I like so much!
Tuesday, November 8, 2011
So Domestic
After my meeting at noon I came home to start making chicken stock for the first time. I also started some bread in the bread machine, started the water kefir now that it was rehydrated, and did a lot of cleaning and organizing. I managed to tackle the hall closet, which finally looks normal again. I also changed the sheets on my bed and put the couch back together. (Someone spilled smoked salmon on one of the covers and it badly needed to be washed.) A maintenance man came by and turned the pilot light on for us and now we have heat! I also ran five errands and made a bunch of phone calls today before my meeting at noon. Let's just say, I was busy.
Here's some of the kitchen-y stuff I've done this afternoon:

I got the water and sugar ready for the water kefir grains.

They now look like this!

It'll brew for a couple more days and then I'll mix the water with some juice and let it carbonate.

This was the beginning of my chicken stock. I've been saving veggie bits and chicken pieces in the freezer until I had enough to make stock with.

It's reduced down quite a bit, but it will still simmer for a few more hours. When it's cool I will put it in jars and freeze some of it, although I will use some of it to make this yummy-looking chicken and rice soup recipe later this week.

I finally found a bread recipe that Jonathan likes! Hooray! I'm a wheat bread girl, he's a white bread guy. I have been trying to find a bread recipe that make wheat bread puffy like white bread and I finally found it!
Now that I am basically back to where I started, job-wise, it's interesting what my morning routine is now. After reading Jena's routine and Jen's routine, I thought I'd share mine. Every morning Jonathan gets up around 6:45 and then I (if I slept well) roll out of bed around 7:30. If I didn't sleep well he'll come let me know at 8 that he's leaving for work and then I usually get out of bed after that. In the past couple of weeks I've been pretty busy going through things to donate and sell, but now that has slowed down a bit and I seem to be doing more cleaning. Every day seems to bring at least one sink's worth of dishes, sometimes two. I've been keeping up with dusting, sweeping, bed-making, keeping the kitchen clean, etc, and I like it! I have been watching more Netflix stuff and reading more magazines lately. It's nice to feel like I have enough time to get a bunch of stuff done and still have time for myself. When Jonathan gets home we hang out and he stays up a few hours after I go to bed, so he gets some alone time, too. I do wish I was working more at Mr. Green Beans, but they are giving me as many hours as they can afford to give me, which is great. I just really like working there! I'm thinking once I find out my schedule from them I will try for a seasonal temporary job to make some money before school starts in January.
Anyway, that's what I did today and what's on my mind. I now must go start some rice for dinner tonight and, yes, wash some dishes. :o)
Subscribe to:
Posts (Atom)